Page 2 - Précautions d’emploi
Précautions d’emploi 1. Cet appareil n’est pas étanche, et ne doit pas être utilisé en extérieur lorsqu’il pleut ou qu’il neige. Si l’appareil tombe acci-dentellement dans l’eau, portez-le au Service Après-VenteCanon. Maintenez l’appareil éloigné des embruns et d’unehumidité excessive. Après l’avoir...
Page 3 - • Comment utiliser ce mode d’emploi; Table des matières
8 Les symboles suivants sont utilisés dans le mode d’emploi: Information supplémentaire sur l’utilisation de l’appareil. Conseils sur l’utilisation de l’appareil. • Comment utiliser ce mode d’emploi Ce mode d’emploi est divisé en quatre chapitres classés par ordrede priorité comme suit: Opérations d...
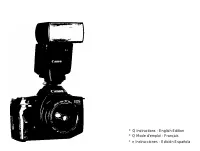
Page 5 - • L’objectif et le flash sont; Utilisation rapide
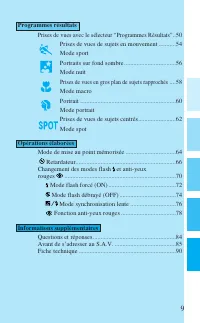
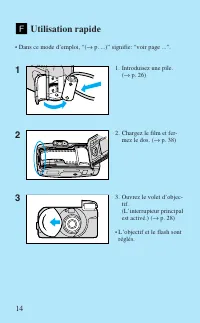
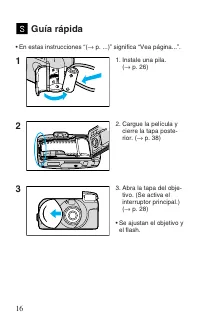
14 1. Introduisez une pile. ( → p. 26) 2. Chargez le film et fer- mez le dos. ( → p. 38) 3. Ouvrez le volet d’objec- tif.(L’interrupteur principalest activé.) ( → p. 28) • L’objectif et le flash sont réglés. 1 2 3 Utilisation rapide • Dans ce mode d’emploi, “( → p. ...)” signifie: “voir page ...”. 0...
Page 15 - Introduisez la pile en orientant ses bornes dans la direction; Instalación de la pila; Basic Operations/Opérations de base/Operaciones básìcas
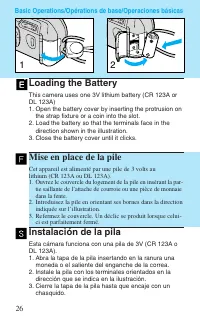
Loading the Battery This camera uses one 3V lithium battery (CR 123A orDL 123A)1. Open the battery cover by inserting the protrusion on the strap fixture or a coin into the slot. 2. Load the battery so that the terminals face in the direction shown in the illustration. 3. Close the battery cover unt...
Page 16 - • La marca de verificación de la pila
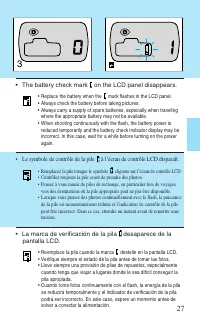
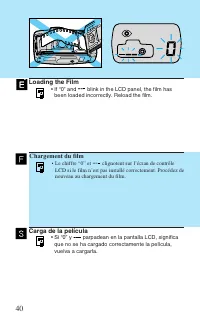
• Le symbole de contrôle de la pile à l’écran de contrôle LCD disparaît. • Remplacez la pile lorsque le symbole clignote sur l’écran de contrôle LCD. • Contrôlez toujours la pile avant de prendre des photos.• Pensez à vous munir de piles de rechange, en particulier lors de voyages vers des destinati...
Page 17 - Apertura de la tapa del objetivo
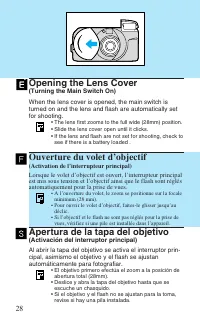
Opening the Lens Cover (Turning the Main Switch On) When the lens cover is opened, the main switch isturned on and the lens and flash are automatically setfor shooting. • The lens first zooms to the full wide (28mm) position.• Slide the lens cover open until it clicks.• If the lens and flash are not...
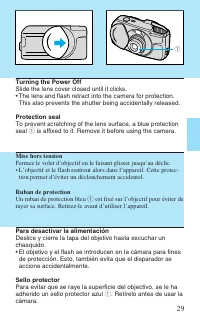
Page 18 - Mise hors tension; tion permet d’éviter un déclenchement accidentel.; Ruban de protection; Un ruban de protection bleu; Para desactivar la alimentación; . Retírelo antes de usar la; Turning the Power Off; This also prevents the shutter being accidentally released.; Protection seal; is affixed to it. Remove it before using the camera.
Mise hors tension Fermez le volet d’objectif en le faisant glisser jusqu’au déclic.• L’objectif et le flash rentrent alors dans l’appareil. Cette protec- tion permet d’éviter un déclenchement accidentel. Ruban de protection Un ruban de protection bleu q est fixé sur l’objectif pour éviter de rayer s...
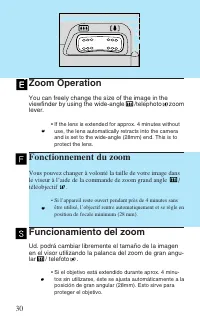
Page 19 - Zoom Operation; zoom; Fonctionnement du zoom; Funcionamiento del zoom
Zoom Operation You can freely change the size of the image in theviewfinder by using the wide-angle /telephoto zoom lever. • If the lens is extended for approx. 4 minutes without use, the lens automatically retracts into the cameraand is set to the wide-angle (28mm) end. This is toprotect the lens. ...
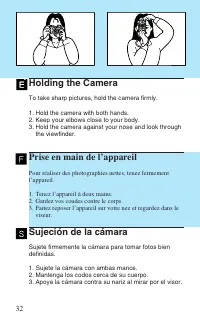
Page 21 - Holding the Camera; To take sharp pictures, hold the camera firmly.; Prise en main de l’appareil
Holding the Camera To take sharp pictures, hold the camera firmly. 1. Hold the camera with both hands.2. Keep your elbows close to your body.3. Hold the camera against your nose and look through the viewfinder. Prise en main de l’appareil Pour réaliser des photographies nettes, tenez fermementl’appa...
Page 25 - Green Indicator Lamp Operation; (When you press the shutter button lightly); Lights up; Fonctionnement du témoin vert; (Lorsque le déclencheur est légèrement enfoncé); Témoin allumé; Funcionamiento de la luz indicadora verde; (Cuando presione ligeramente el disparador); Se ilumina; El sujeto está enfocado (listo para la toma); Parpadea
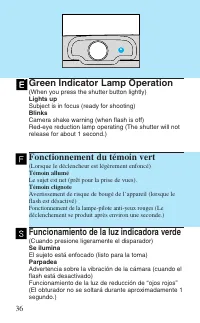
Green Indicator Lamp Operation (When you press the shutter button lightly) Lights up Subject is in focus (ready for shooting) Blinks Camera shake warning (when flash is off)Red-eye reduction lamp operating (The shutter will notrelease for about 1 second.) Fonctionnement du témoin vert (Lorsque le dé...
Page 26 - Viseur; Cadre de l’image; Placez ce collimateur sur le sujet.; Collimateur macro; Visor; Recuadro de la imagen; Sitúe este cuadro sobre el sujeto.; Cuadro de primer plano; Viewfinder; Picture frame; Place this frame over the subject.
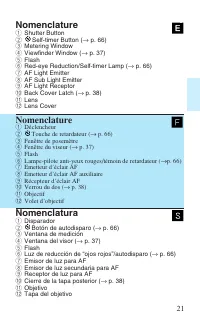
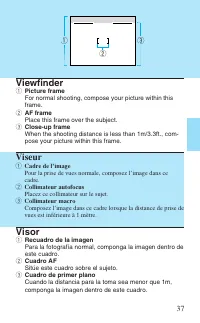
37 Viseur q Cadre de l’image Pour la prise de vues normale, composez l’image dans cecadre. w Collimateur autofocus Placez ce collimateur sur le sujet. e Collimateur macro Composez l’image dans ce cadre lorsque la distance de prise devues est inférieure à 1 mètre. Visor q Recuadro de la imagen Para l...
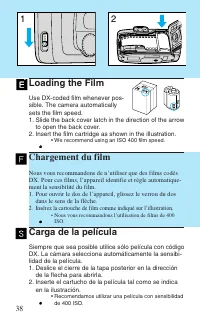
Page 27 - Chargement du film; dans le sens de la flèche.; Carga de la película; de la flecha para abrirla.; Loading the Film; to open the back cover.
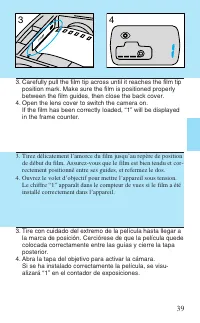
38 OPEN 1 2 Chargement du film Nous vous recommandons de n’utiliser que des films codésDX. Pour ces films, l’appareil identifie et règle automatique-ment la sensibilité du film.1. Pour ouvrir le dos de l’appareil, glissez le verrou du dos dans le sens de la flèche. 2. Insérez la cartouche de film co...
Page 32 - Centrez le collimateur autofocus sur le sujet. Appuyez légère-
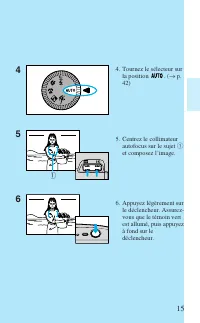
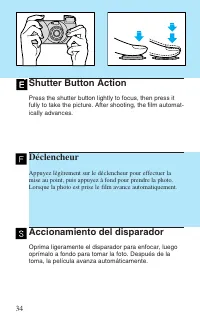
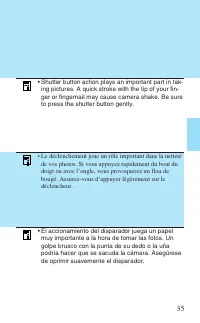
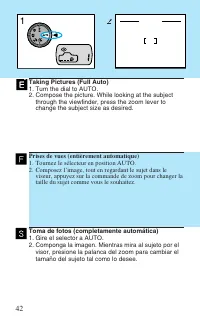
43 3. Centrez le collimateur autofocus sur le sujet. Appuyez légère- ment sur le déclencheur et assurez-vous que le témoin vert estallumé. 4. Déclenchez doucement à fond pour prendre la photo.• Le flash se déclenche automatiquement quand la lumière est insuffisante. 3. Sitúe el cuadro AF sobre el su...
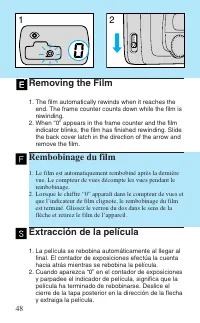
Page 37 - Removing the Film; The film automatically rewinds when it reaches the; Rembobinage du film; Le film est automatiquement rembobiné après la dernière; Extracción de la película; La película se rebobina automáticamente al llegar al
48 Removing the Film 1. The film automatically rewinds when it reaches the end. The frame counter counts down while the film isrewinding. 2. When “0” appears in the frame counter and the film indicator blinks, the film has finished rewinding. Slidethe back cover latch in the direction of the arrow a...
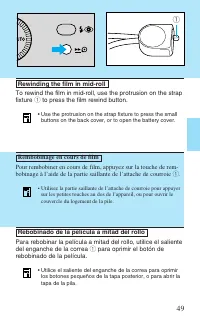
Page 38 - Rebobinado de la película a mitad del rollo; para oprimir el botón de; Rembobinage en cours de film; to press the film rewind button.
Rebobinado de la película a mitad del rollo Para rebobinar la película a mitad del rollo, utilice el salientedel enganche de la correa q para oprimir el botón de rebobinado de la película. • Utilice el saliente del enganche de la correa para oprimir los botones pequeños de la tapa posterior, o para ...
Page 39 - Active Operations/Programmes résultats/Operaciones activas
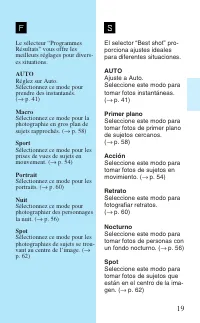
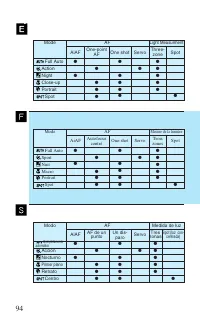
Fotografía con el selector “Bestshot” Con sólo girar este selector, se efectúa el ajuste delmodo AF apropiado, del modo de avance de la película,del modo de flash y otros modos, para que Ud. puedatomar fotos preciosas con facilidad. Prises de vues avec le sélecteur“Programmes Résultats” Grâce à une ...
Page 41 - Pantalla LCD; LCD Panel
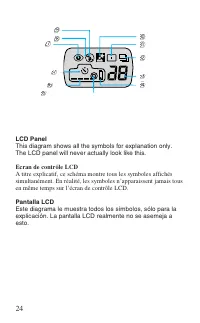
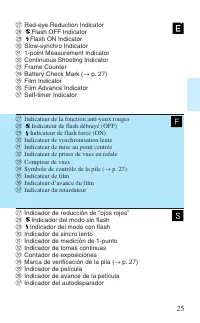
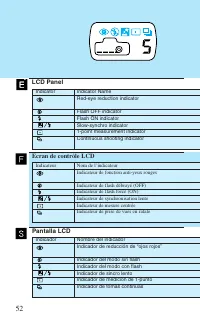
52 Pantalla LCD Indicator Indicator NameRed-eye reduction indicator Flash OFF indicatorFlash ON indicatorSlow-synchro indicator1-point measurement indicatorContinuous shooting indicator LCD Panel Ecran de contrôle LCD Indicateur Nom de l’indicateurIndicateur de fonction anti-yeux rouges Indicateur d...
Page 43 - Taking Pictures of Moving Subjects; When you turn the dial to; Prises de vues de sujets en mouvement; Lorsque vous tournez le sélecteur en position; Fotografía de sujetos en movimiento; Cuando gire el selector a
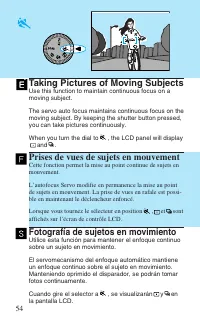
54 Taking Pictures of Moving Subjects Use this function to maintain continuous focus on amoving subject. The servo auto focus maintains continuous focus on themoving subject. By keeping the shutter button pressed,you can take pictures continuously. When you turn the dial to , the LCD panel will disp...
Page 44 - Maintenez le collimateur autofocus sur le sujet en mouvement.; Mantenga el cuadro AF sobre el sujeto en movimiento.
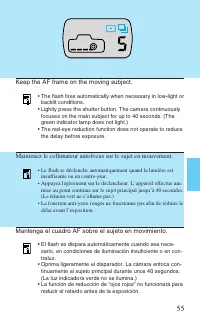
55 Maintenez le collimateur autofocus sur le sujet en mouvement. • Le flash se déclenche automatiquement quand la lumière est insuffisante ou en contre-jour. • Appuyez légèrement sur le déclencheur. L’appareil effectue une mise au point continue sur le sujet principal jusqu’à 40 secondes.(Le témoin ...
Page 45 - Portraits sur fond sombre; Lorsque vous tournez le sélecteur sur
56 Taking Portraits Against a NightBackground Use this function for best results when taking pictures ofpeople against a night background. Flash and slow shutter speed are combined so that theflash illuminates the subject, and the slow shutter speedilluminates a clear night background. When you turn...
Page 46 - Pour la prise de vues de nuit uniquement
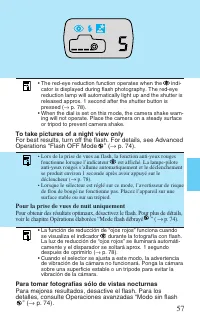
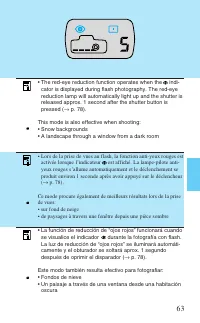
57 • Lors de la prise de vues au flash, la fonction anti-yeux rouges fonctionne lorsque l’indicateur est affiché. La lampe-pilote anti-yeux rouges s’allume automatiquement et le déclenchementse produit environ 1 seconde après avoir appuyé sur ledéclencheur ( → p. 78). • Lorsque le sélecteur est régl...
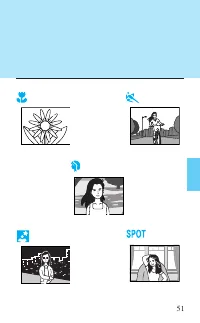
Page 47 - Taking Close-ups of Nearby Objects
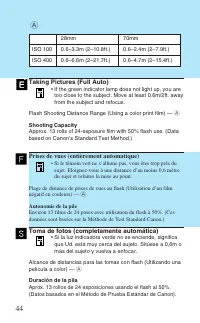
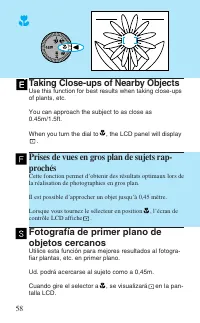
58 Taking Close-ups of Nearby Objects Use this function for best results when taking close-upsof plants, etc. You can approach the subject to as close as0.45m/1.5ft. When you turn the dial to , the LCD panel will display . Prises de vues en gros plan de sujets rap-prochés Cette fonction permet d’obt...
Page 48 - . Mientras oprime ligeramente el disparador,
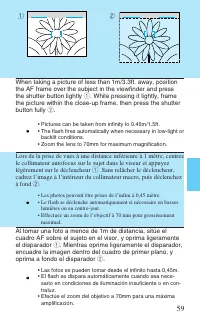
59 Lors de la prise de vues à une distance inférieure à 1 mètre, centrezle collimateur autofocus sur le sujet dans le viseur et appuyezlégèrement sur le déclencheur q . Sans relâcher le déclencheur, cadrez l’image à l’intérieur du collimateur macro, puis déclenchezà fond w . • Les photos peuvent êtr...
Page 49 - Portrait; Taking Portraits; Use this function for best results when taking portraits.; Fotografía de retratos
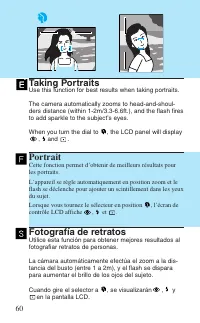
Portrait Cette fonction permet d’obtenir de meilleurs résultats pourles portraits. L’appareil se règle automatiquement en position zoom et leflash se déclenche pour ajouter un scintillement dans les yeuxdu sujet. Lorsque vous tournez le sélecteur en position , l’écran de contrôle LCD affiche , et . ...
Page 50 - Centrez le collimateur autofocus sur le sujet.; Centre el cuadro AF sobre el sujeto.; Position the AF frame over the subject.
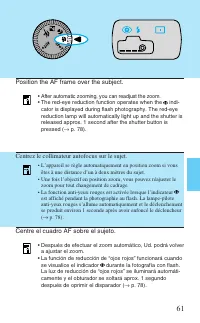
61 Centrez le collimateur autofocus sur le sujet. • L’appareil se règle automatiquement en position zoom si vous êtes à une distance d’un à deux mètres du sujet. • Une fois l’objectif en position zoom, vous pouvez réajuster le zoom pour tout changement de cadrage. • La fonction anti-yeux rouges est ...
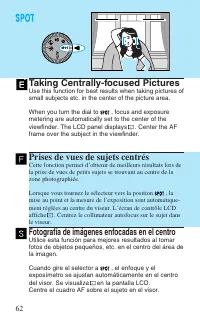
Page 51 - Taking Centrally-focused Pictures; Prises de vues de sujets centrés; Lorsque vous tournez le sélecteur vers la position; Fotografía de imágenes enfocadas en el centro
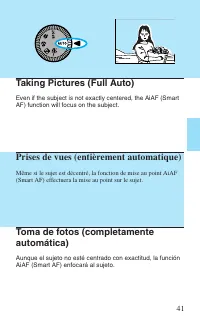
62 Taking Centrally-focused Pictures Use this function for best results when taking pictures ofsmall subjects etc. in the center of the picture area. When you turn the dial to , focus and exposure metering are automatically set to the center of theviewfinder. The LCD panel displays . Center the AF f...
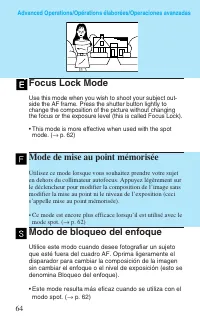
Page 53 - Focus Lock Mode; • This mode is more effective when used with the spot; Mode de mise au point mémorisée; • Ce mode est encore plus efficace lorsqu’il est utilisé avec le; Modo de bloqueo del enfoque; • Este mode resulta más eficaz cuando se utiliza con el
Focus Lock Mode Use this mode when you wish to shoot your subject out-side the AF frame. Press the shutter button lightly tochange the composition of the picture without changingthe focus or the exposure level (this is called Focus Lock). • This mode is more effective when used with the spot mode. (...
Page 54 - Centrez le collimateur autofocus sur le sujet. Appuyez légère-; Centre el cuadro AF sobre el sujeto. Oprima ligeramente
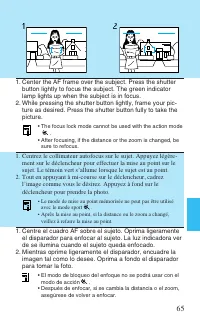
1. Centrez le collimateur autofocus sur le sujet. Appuyez légère- ment sur le déclencheur pour effectuer la mise au point sur lesujet. Le témoin vert s’allume lorsque le sujet est au point. 2. Tout en appuyant à mi-course sur le déclencheur, cadrez l’image comme vous le désirez. Appuyez à fond sur l...
Page 55 - Retardateur; La fonction retardateur vous permet de figurer sur la photo.; Modo de autodisparo; Oprima el botón de autodisparo. Asegúrese de que
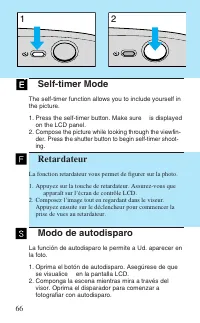
Self-timer Mode The self-timer function allows you to include yourself inthe picture. 1. Press the self-timer button. Make sure is displayed on the LCD panel. 2. Compose the picture while looking through the viewfin- der. Press the shutter button to begin self-timer shoot-ing. Retardateur La fonctio...
Page 56 - • La lampe-pilote anti-yeux rouges/témoin de retardateur clignote; Pour annuler la fonction retardateur; • Fermez le volet d’objectif pour mettre hors tension.; Para cancelar el modo de autodisparo
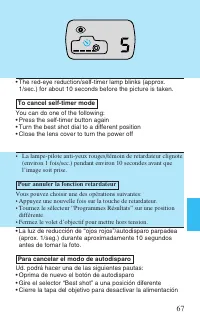
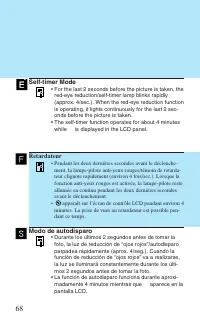
• La lampe-pilote anti-yeux rouges/témoin de retardateur clignote (environ 1 fois/sec.) pendant environ 10 secondes avant quel’image soit prise. Pour annuler la fonction retardateur Vous pouvez choisir une des opérations suivantes:• Appuyez une nouvelle fois sur la touche de retardateur.• Tournez le...
Page 59 - Modes
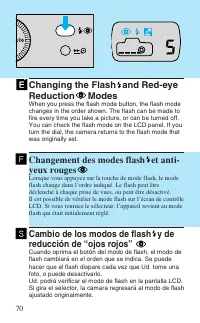
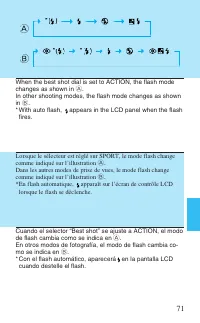
Changing the Flash and Red-eyeReduction Modes When you press the flash mode button, the flash modechanges in the order shown. The flash can be made tofire every time you take a picture, or can be turned off.You can check the flash mode on the LCD panel. If youturn the dial, the camera returns to the...
Page 61 - Flash ON Mode
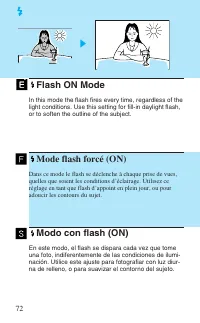
Flash ON Mode In this mode the flash fires every time, regardless of thelight conditions. Use this setting for fill-in daylight flash,or to soften the outline of the subject. Mode flash forcé (ON) Dans ce mode le flash se déclenche à chaque prise de vues,quelles que soient les conditions d’éclairage...
Page 63 - Flash OFF Mode; Press the flash mode button until
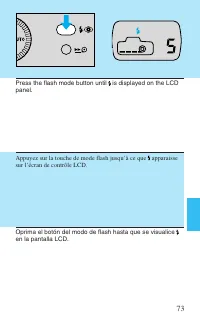
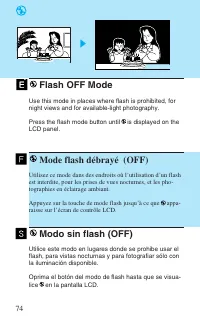
Flash OFF Mode Use this mode in places where flash is prohibited, fornight views and for available-light photography. Press the flash mode button until is displayed on the LCD panel. Mode flash débrayé (OFF) Utilisez ce mode dans des endroits où l’utilisation d’un flashest interdite, pour les prises...
Page 65 - Mode synchronisation lente
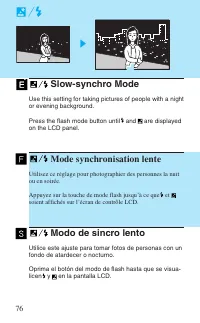
Slow-synchro Mode Use this setting for taking pictures of people with a nightor evening background. Press the flash mode button until and are displayed on the LCD panel. Mode synchronisation lente Utilisez ce réglage pour photographier des personnes la nuitou en soirée. Appuyez sur la touche de mode...
Page 69 - Función de reducción de “ojos rojos”
Red-eye Reduction Function • When the red-eye reduction lamp lights, the green indicator lamp blinks. • When the red-eye reduction lamps lights, the shutter will not release for about 1 second. This is toincrease the effectiveness of the red-eye reductionfunction. If you want to shoot right away, pr...
Page 70 - Important guidelines for using the red-eye reduction function; This function is not effective unless the subject looks at
Points importants pour l’utilisation de la fonction anti-yeuxrouges 1. Cette fonction n’est efficace que si le sujet regarde directement la lampe-pilote anti-yeux rouges lorsqu’elle est allumée.Demandez à votre sujet de regarder directement la lampe. 2. Restez à une distance d’environ 2 mètres du su...
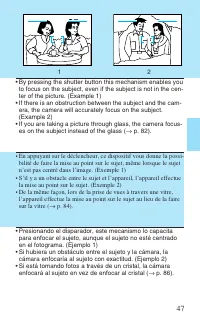
Page 71 - Questions et réponses; Comment faut-il prendre des photos à travers une vitre?; Sujet
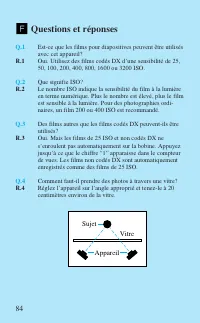
Questions et réponses Q.1 Est-ce que les films pour diapositives peuvent être utilisésavec cet appareil? R.1 Oui. Utilisez des films codés DX d’une sensibilité de 25,50, 100, 200, 400, 800, 1600 ou 3200 ISO. Q.2 Que signifie ISO? R.2 Le nombre ISO indique la sensibilité du film à la lumièreen terme ...
Page 73 - Fiche technique; Plage de distance de prises de vues:
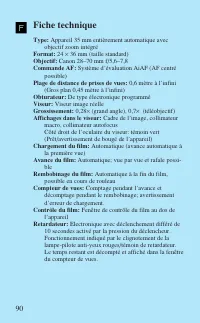
Fiche technique Type: Appareil 35 mm entièrement automatique avec objectif zoom intégré Format: 24 × 36 mm (taille standard) Objectif: Canon 28–70 mm f/5,6–7,8 Commande AF: Système d’évaluation AiAF (AF centré possible) Plage de distance de prises de vues: 0,6 mètre à l’infini (Gros plan 0,45 mètre ...


 Canon 250
Manuel d'utilisation
Canon 250
Manuel d'utilisation
 Canon imageRUNNER ADVANCE DX C3935i
Manuel d'utilisation
Canon imageRUNNER ADVANCE DX C3935i
Manuel d'utilisation
 Canon MF269DW VP
Manuel d'utilisation
Canon MF269DW VP
Manuel d'utilisation
 Canon D1620
Manuel d'utilisation
Canon D1620
Manuel d'utilisation
 Canon 525
Manuel d'utilisation
Canon 525
Manuel d'utilisation
 Canon D570
Manuel d'utilisation
Canon D570
Manuel d'utilisation
 Canon 215
Manuel d'utilisation
Canon 215
Manuel d'utilisation
 Canon 238
Manuel d'utilisation
Canon 238
Manuel d'utilisation
 Canon 236
Manuel d'utilisation
Canon 236
Manuel d'utilisation
 Canon 226
Notice
Canon 226
Notice
 Canon FM1M944
Notice
Canon FM1M944
Notice
 Canon 228
Notice
Canon 228
Notice
 Canon CU 90
Manuel d'utilisation
Canon CU 90
Manuel d'utilisation
 Canon TR
Manuel d'utilisation
Canon TR
Manuel d'utilisation
 Canon 260Z
Manuel d'utilisation
Canon 260Z
Manuel d'utilisation
 Canon 430 EZ
Manuel d'utilisation
Canon 430 EZ
Manuel d'utilisation
 Canon 4374B001
Manuel d'utilisation
Canon 4374B001
Manuel d'utilisation
 Canon 7876A003 - CanoScan LiDE 50 Color Scanner
Manuel d'utilisation
Canon 7876A003 - CanoScan LiDE 50 Color Scanner
Manuel d'utilisation
 Canon 80 Tele
Manuel d'utilisation
Canon 80 Tele
Manuel d'utilisation