Weston 82-0301-W - Manuels
Hachoir à viande Weston 82-0301-W - Manuel d'utilisation en ligne au format PDF.
Manuels:
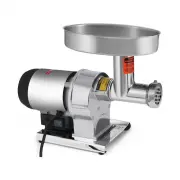
Manuel d'utilisation Weston 82-0301-W
Résumé
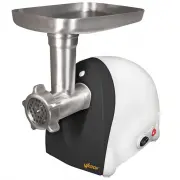
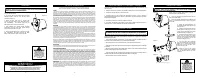
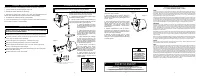
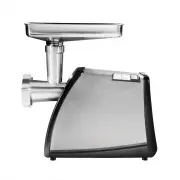
COMPONENT LIST If any components of this unit are broken or the unit does not operate properly, call Weston Products LLC Toll Free at 1-800-814-4895 Monday thru Friday 8:00am-5:00pm EST. Outside the U.S. call 440-638-3131 NOTE! French instructions and information follow the English instructions and ...
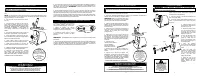
IMPORTANT SAFEGUARDS When using electrical appliances, basic safety precautions should always be followed including the following: 1. READ ALL INSTRUCTIONS BEFORE USING THE APPLIANCE. 2. To protect against risk of electrical shock, do not submerge or use this appliance near water or other liquid. 3....
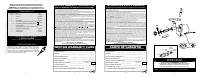
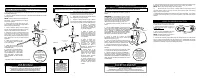
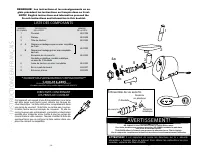
CLEANING 1. Unscrew the Ring Nut and remove all parts from the Grinder Head. 2. To remove the Grinder Head, press the Head Release Button and turn the Grinder Head clockwise (Figure A). 3. Wash all parts that come in contact with food in hot soapy water. Rinse with clear water. Dry immediately. The ...
Weston Hachoirs à viande Manuels
-
 Weston 09-0501-W
Manuel d'utilisation
Weston 09-0501-W
Manuel d'utilisation
-
 Weston 09-0801-W
Manuel d'utilisation
Weston 09-0801-W
Manuel d'utilisation
-
 Weston 09-1201-W
Manuel d'utilisation
Weston 09-1201-W
Manuel d'utilisation
-
 Weston 09-2201-W
Manuel d'utilisation
Weston 09-2201-W
Manuel d'utilisation
-
 Weston 09-3201-W
Manuel d'utilisation
Weston 09-3201-W
Manuel d'utilisation
-
 Weston 10-0801-W
Manuel d'utilisation
Weston 10-0801-W
Manuel d'utilisation
-
 Weston 10-1201-W
Manuel d'utilisation
Weston 10-1201-W
Manuel d'utilisation
-
 Weston 10-2201-W
Manuel d'utilisation
Weston 10-2201-W
Manuel d'utilisation
-
 Weston 10-3201-W
Manuel d'utilisation
Weston 10-3201-W
Manuel d'utilisation
-
 Weston 33-0801-W
Manuel d'utilisation
Weston 33-0801-W
Manuel d'utilisation
-
 Weston 36-1901-W
Manuel d'utilisation
Weston 36-1901-W
Manuel d'utilisation