Page 2 - GARANTIE LIMITÉE D’UN AN
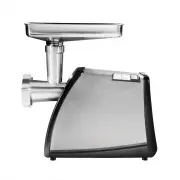
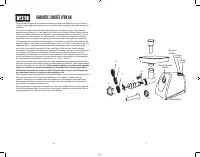
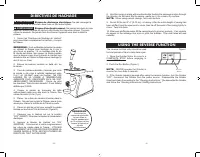
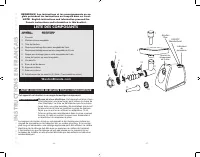
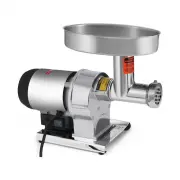
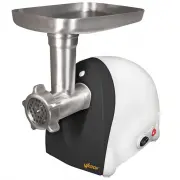
11 1 2 Head Release Button 3 7 10 9 8 6 12 4 5 Power Switch Reverse Button Power Light Body/Motor -3- -30- GARANTIE LIMITÉE D’UN AN Cette garantie s’applique aux produits achetés et utilisés aux États-Unis et au Canada. Il s’agit de l’unique garantie explicite pour ce produit et elle remplace toute ...
Page 3 - IMPORTANT SAFETY RULES; SAVE THESE INSTRUCTIONS!; INFORMATIONS SUR LES SAUCISSES
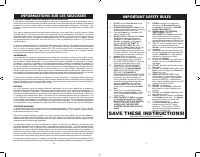
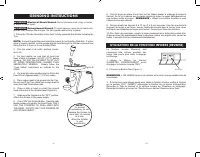
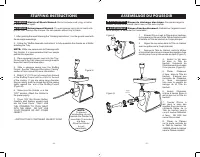
1. DO NOT use the Grinder without the Tray secured into place. 2. ALWAYS DISCONNECT Grinder from power source before servicing, changing accessories or cleaning the unit. 3. Plug the Grinder into a standard 120 Volt, 60 Hz wall outlet. 4. DO NOT USE the Grinder if the Power Cord, Plug or any other p...
Page 4 - CLEANING; SÉCURITÉ ALIMENTAIRE
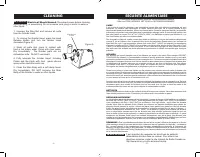
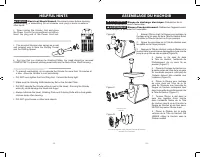
Head Release Button CLEANING 1. Unscrew the Ring Nut and remove all parts from the Grinder Head. 2. To remove the Grinder Head, press the Head Release Button and turn the Grinder Head clockwise (Figure A). 3. Wash all parts that come in contact with food in hot soapy water. Rinse with clear water. D...
Page 5 - GRINDER ASSEMBLY; AVERTISSEMENT
Figure B 1. Remove the Ring Nut, Grinding Plate, Knife and Auger from the Grinder Head before installing the Grinder Head to the Main Body.2. Align the notches on the Grinder Head with the tabs on the Main Body. 3. Press the Grinder Head against the Motor and rotate it counterclockwise until it lock...
Page 6 - GRINDING INSTRUCTIONS; UTILISATION DE LA FONCTION INVERSE (REVERSE)
1. Follow the “Grinder Assembly Instructions” to fully assemble the Grinder including the Tray. NOTE: It is best to grind the meat using the coarse, 8 mm Grinding Plate first. If a finer grind of meat is desired, run the coarse ground meat through the Grinder a second time using the fine, 4.5 mm or ...
Page 7 - STUFFER ASSEMBLY
Figure F Figure G Auger Driver STUFFER ASSEMBLY 1. Remove the Ring Nut, Grinding Plate, Knife and Auger from the Grinder Head before installing the Grinder Head to the Main Body.2. Align the notches in the Grinder Head with the tabs on the Main Body. 3. Press the Grinder Head against the Motor and r...
Page 9 - USING THE REVERSE FUNCTION; DIRECTIVES DE HACHAGE
8. Hold the casing in place with one hand while feeding the sausage mixture through the Grinder. As the meat fills the casing, gently lay it on a clean, dry surface. NOTE: When using natural casings, use a wet surface. 9. Do not fill the last 3”-4” (8-10 cm) of casing. After the entire length of cas...
Page 11 - FOOD SAFETY
There are basic rules to follow when handling food. They are COOK, SEPARATE, CLEAN, and CHILL. COOK It’s crucial to cook food to a safe internal temperature to destroy bacteria that is present. The safety of hamburgers and other foods made with ground meat has been receiving a lot of attention latel...
Page 12 - SAUSAGE INFORMATION; IMPORTANTES RÈGLES DE SÉCURITÉ; CONSERVER CES DIRECTIVES!
SAUSAGE INFORMATION MEAT SELECTION FOR SAUSAGE MAKING Sausage making has evolved over many years and generations, and as a result there are countless types of sausage you can make using the basic ingredients of meat, fat and a few carefully blended spices. Following are a few simple guidelines that ...
Page 13 - CONSERVER CES INSTRUCTIONS; PRÉCAUTIONS IMPORTANTES
1. Lire toutes les instructions. 2. Cet appareil n’est pas destiné à être utilisé par des personnes dont les capacités physiques, sensorielles ou mentales sont réduites, ou manquant d’expérience et de connaissance, sauf si elles sont étroitement surveillées et instruites sur l’utilisation de l’appar...
Page 14 - LISTE DES COMPOSANTS; INSTRUCTIONS EN FRANÇAIS; AUTRES CONSIGNES DE SÉCURITÉ POUR LE CONSOMMATEUR
LISTE DES COMPOSANTS REMARQUE! Les instructions et les renseignements en an- glais précèdent les instructions en français dans ce livret. NOTE! English instructions and information proceed the French instructions and information in this booklet. . . . . . . INSTRUCTIONS EN FRANÇAIS . . . . . . Westo...