Page 2 - I Thank you for selecting a Canon camera.; I Nous vous remercions d’avoir choisi un; I Muchas gracias por elegir una cámara
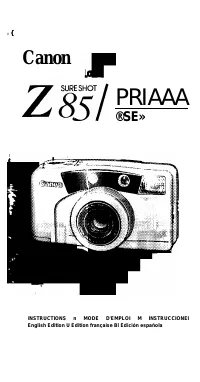
I Thank you for selecting a Canon camera. Please read through these instructions carefully for a thorough understanding before taking pictures. This is an easy-to-use, fully automatic camera Taking great pictures is easy, as the Al AF (Smart AF) function automatically delects the subject and focuses...
Page 3 - • Howto Use These Instructions; • Acerca de estas instrucciones
3 Real Time mode reduces delay from focus to shutter release to 0 06 second, enabling up to 2 frames/second continuous shooting 4 High-precision Active AI AF {Smart AF) 5 Self-timer mode lets you take pictures from a distance 6 Close-up mode for enlarged shots of nearby objects • Howto Use These Ins...
Page 4 - Utilisation rapide; Guía rápida
Utilisation rapide Guía rápida • Dans ce mode d'emploi signifie “Voir page..." Chargez le film. (—> 34) • En estas instrucciones “ ^ significa “Vea página.." Cargue la película. (-> 34) Activez l'interrupteur principal pour mettre sous tension. 36) Presione el interruptor principal par...
Page 5 - Table des Matières
Table des Matières ---------------- 1 I I Mises en garde à observer lors de l’utilisaLion de ruppareil. j I Les symboles \ isuels snivanis sont utilisés: I 'Q' Conseils sur Tutilisation de l'appareil I lnln»du(;tkm Utilisation rapide................................. . ....... 5 Table des matières......
Page 6 - Inrormulions supplémvnluires
Opérations élaborées liSi Mixlf gros plan............................ (t) Photographias au retardateur 1^ Mode temps réel............................ Chaiigenrent du mode flash................ 4 Mode Hash forcé.............................. Mode flash débrayé.................. R/V Mode synehrtmisali...
Page 8 - Nomenclature; Nomenclatura
Nomenclature Q I AF Light Receptor 2 ; Shutter Button X Cfi Telephoto Zoom Button % ins Wide-angle Zoom Button X/ AE Light Receptor X AF Light Emitter ■CZ; Viewfinder Window (-> 30) Flash X Self-timer/Red-eye Reduction Lamp {—> 64) 30 Back Cover Opening Latch I 1 ; Lens Nomenclature Q ClZ' Fen...
Page 11 - LCD Panel; Ecran de contrôle LCD; Pantalla LCD
LCD Panel This diagram shows aii the symbois for explanation oniy The LCD panei never actuaiiy iooks iike this. Ecran de contrôle LCD Ce schéma ne montre tous les symboles qu’à titre explicatif. Ces symboles ne seront jamais tous affichés en même temps. Pantalla LCD Este diagrama le muestra todos lo...
Page 12 - Il; II
Nomenclature 25 Self-timer mark 26 Real Time mode mark 27 Frame Counter 28 Battery Check mark 29 Film Cartridge mark 3Q Film Transport marks 31 Close-up mode32 Red-eye reduction mode 33 Slow-sync mode ■34 Flash ON mode 35 Flash OFF mode Nomenclature @ Symtxile de retardateur Il Symbole de mode temps...
Page 13 - Précautions d’emploi
Précautions d’emploi I Cet appareil n'est pas étanche et ne doit pas être utilisé à l'extérieur quand il pleut ou quand il neige. Si par accident, il tombait dans l'eau, portez-le au Service Après-Vente Canon dans les plus brefs délais. Evitez d’exposer l'appareil aux embruns et à une humidité exces...
Page 15 - Loading the Batteries; Mise en place des piles; Instalación de las pilas
Loading the Batteries This camera uses two CR 123A/DL 123A three-volt lithium batteries. 1. Using a coin, turn and loosen the screw in the direction of the arrow Remove the battery cover Mise en place des piles Cel üppiireilest alimenié par deux piles CR 123A/DL l23Ade trois volts au lithium. 1 A I'...
Page 17 - Piles; Pilas
Batteries I Two 3V lithium batteries (CR 123A/DL 123A) Shooting Capacity Approx. 50 rolls of 24-exp. film with 50% flash use. (Data based on Canon’s Standard Test Method). Piles Deux piles de 3 volts au lithium (CR I23A/DL I23A) Autonomie de prises de vues Environ 50 rouleaux de 24 poses avec une ut...
Page 19 - Holding the Camera; Try the following technique to ensure sharp pictures.; Prise en main de l’appareil; Sujección de la cámara; Practique la siguiente técnica de sujección para asegurar
Holding the Camera Try the following technique to ensure sharp pictures. 1. Hold the camera with both hands 2. Keep your elbows close to your body.3. Hold the camera lightly against your nose and look through the viewfinder. Prise en main de l’appareil Pour réaliser des photographies nettes, nous vo...
Page 21 - Shutter Button Action; Press the shutter button lightly to focus, then press it all; Déclencheur; I Accionamiento del disparador; Presione el disparador levemente para enfocar, luego
Shutter Button Action Press the shutter button lightly to focus, then press it all the way down to take the picture. After shooting, the film automatically advances. Déclencheur Appuyez légèrement sur le déclencheur pour effectuer la mise au point, puis appuyez à fond pour prendre la photo. Lorsque ...
Page 23 - Viewfinder; Picture Frame; AF Frame; I Viseur; L Cadre de l’image; Visor; Recuadro de la imagen; Marca AF
Viewfinder 1 Picture Frame Compose the picture in this frame. 2 AF Frame Place the subject within this frame and focus. I Viseur L Cadre de l’image Composez l'image dans ce cadre. ( 2 ) Collimateur autofocus Cadrez le sujet dans ce cadre et effectuez la mise au point. Visor 1 Recuadro de la imagen C...
Page 24 - Parallax Correction Lines; Collimateur autofocus de gros plan; Lignes de correction de paraiiaxe; '3 Marca AF de primer piano
Close-up AF Frame When shooting distance is less than lm/3.3 ft., place the subject within this frame. Parallax Correction Lines When shooting distance is less than 1m/3.3 ft., compose the picture within this frame. 3; Collimateur autofocus de gros plan Lorsque la distance de prise de vues est infér...
Page 25 - I Zoom Operation; Wide-angle Zoom Button; I Fonctionnement du zoom; EÜ] Touche de réglage grand angle de zoom; Operación del zoom; EDI
38mm 85mm I Zoom Operation You can use the EDI wide-angle and Ctt telephoto zoom buttons while looking through the viewfinder to freely change the size of the subject’s image. EDI Wide-angle Zoom Button The lens is set to 38mm wide-angle. This gives you a wide field of view. Use this for group pictu...
Page 26 - Cf] Touche de réglage téléobjectif de zoom
[(] Telephoto Zoom Button The lens is set to 85mm telephoto This makes the subject's image larger Use this for taking portraits of people. • If the lens IS extended for approx 4 minutes without use P the lens automatically withdraws into the camera and is set to the wide-angle (30mm) end. This is to...
Page 27 - Loading the Film; Chargement du film; Carga de la película
Loading the Film Use only DX-coded film whenever possible. The camera automatically sets the film speed • ISO 25 film is not taken up automatically. (—> 68) 1 Slide the back cover latch down to open the back cover. 2. Insert the flat end of the film cartridge first. Chargement du film Nous sous r...
Page 28 - properly beiween the fii’it guirifo'; Cerciórese
I 3. Carefully pull the film tip across until it reaches the film tip position mark l . Make sure 'ne ii n .s posiuoned properly beiween the fii’it guirifo' . then cjose the back cover 4. Turn the main switch ON The film automatically advances to the first frame, and “1" appears in the frame cou...
Page 29 - Even if the subject is not exactly centered on the AF; Active el interruptor principal La cámara se ajusta al
{Taking Pictures (Flash AUTO) Turn the main switch ON The camera is set to Flash AUTO mode. Even if the subject is not exactly centered on the AF frame, Al AF (Smart AF) can focus on the subject. Prises de vues (Flash AUTO) Activez rinlerrupleur principal. L'appareil est réglé en mode Hash AUTO.Même...
Page 33 - Indicator Lamp Operation; Fonctionnement du témoin; Operación de la luz indicadora
Indicator Lamp Operation Lights up Subjecl IS in focus (ready for shooling) Off (does not light up) You are loo close fo the subject Move farther away (at least 0.6m/2ft) and refocus Blinks rapidly (16 times/sec.) Camera-shake warning (when flash is OFF) When Red-eye reduction lamp IS flashing: Flas...
Page 34 - Removing the Film; Dépose du film; Extracción de la película
Removing the Film 1 The film is rewound automatically at the end of the roll. The frame counter counts down while the film is rewinding 2. When 0 appears in the frame counter, © blinks and film rewind stops, slide the back cover opening latch down to open the back cover and remove the film. Dépose d...
Page 35 - Rewinding the fiim in mid-roli; Rembobinage du film en milieu de rouleau; Rebobinado de ia peiícula a mitad dei roiio
Rewinding the fiim in mid-roli To rewind the film in mid-roll, use the protrusion on the strap fixture to press the film rewind button. Rembobinage du film en milieu de rouleau Pour rembobinage le film en milieu de rouleau, appuyez sur la touche de rembobinage avec la protubérance de l'extrémité de ...
Page 36 - Opérations élaborées; Operaciones avanzadas
Advanced Operations This section explains how to take pictures using the Close-up, self-timer and Real Time mode, and how to use the flash modes. Opérations élaborées Ce chapitre décrit en détails comment Faire des photos en mode gros plan, au retardateur et à l'aide du mode temps réel, el comment u...
Page 37 - Mode gros plan; Modo de primer piano
Close-up Mode In Close-up mode, the focal length is set to 85mm You can approach the subject to 0 45m (1 -4ft.) 1 Press the Close-up button Check that X appears in the LCD Panel 2 Place the subject within the Close-up AF Frame i Press the shutter button lightly to set the focal length The indicator ...
Page 40 - Prise de vues au retardateur; Fotografía con autodisparo
0 The self-timer function allows you to include yourself In the picture. 1 Press the Shutter Release Mode button Make sure 0 is displayed on the LCD panel 2. Compose the picture while looking through the viewfinder and press the shutter button to begin self- timer shooting. Prise de vues au retardat...
Page 41 - Pour annuler le mode retardateur:; Para cancelar el modo de autodisparo:
Standard Standard ^ Estándar —► Cy Press once Appuyez une fois Oprima una vez -r Press again Appuyez à nouveau Oprima de nuevo The Shutter Release mode changes as shown. •The self-timer/red-eye reduction lamp blinks slowly (about 1/sec.) for about 10 seconds. Then the picture is taken. To cancel sel...
Page 44 - Mode temps réel; Modo de tiempo real
Real Time Release is combined with the Continuous Shooting tunction to give you the quick response time you need to get the right picture every time, even in fast- moving situations. Mode temps réel l.e déclenchemeni au temps réel combiné à la fonction de prise de vues en rafale réduit le temps de r...
Page 45 - Déclenchement au temps réel; Liberación del disparo del tiempo real
Real-time release Press the shutter button lightly to focus When the shutter button is pressed all the way down, the delay between pressing the button (focusing) and shutter release is reduced to 0.06 seconds 1 Press the Shutter Release Mode button until i® appears in the LCD Panel. Déclenchement au...
Page 48 - Changing the Flash Mode; Changement du mode flash; Cambio del modo de flash
Changing the Flash Mode When you press the flash mode button, the flash mode changes in the order shown The flash can be made to fire every time you take a picture, or turned off. You can check the flash mode on the LCD panel. If you turn the main switch OFF, the camera returns to flash AUTO (i<g...
Page 51 - Press the flash mode button until ^ appears in the LCD; Presione el botón de modo de flash hasta que aparezca J
Press the flash mode button until ^ appears in the LCD Panei. Appuyez sur la touche de mode flash jusqu'à ce que ^ soit affiché sur l’écran LCD. ] Presione el botón de modo de flash hasta que aparezca J en la pantalla LCD. 59
Page 52 - Flash OFF Mode; Use this mode in places where use of flash is prohibited,; Mode flash débrayé; Modo sin flash; utilice este modo en lugares donde se prohibe utilizar el
Flash OFF Mode Use this mode in places where use of flash is prohibited, for night views, and for avaiiable-light photography. Mode flash débrayé Utilisez celte fonction dans des endroits où l'utilisation d'un flash est interdite, pour les prises de vues nocturnes, et des photographies sous l'éclair...
Page 54 - Use this setting for portraits of people with a night or; Mode synchronisation lente; Modo sincro lento; utilice este modo para tomar retratos de personas con un
Slow-sync Mode Use this setting for portraits of people with a night or evening background. Mode synchronisation lente Utilisez ce réglage pour réaliser des portraits de personnes la nuit ou en soiree Modo sincro lento utilice este modo para tomar retratos de personas con un fondo de atardecer o noc...
Page 56 - Red-eye Reduction Mode; Mode anti-yeux rouges; Modo de reducción de “ojos rojos”
<@> Red-eye Reduction Mode In flash photography in dark places, the subject’s eyes may appear red. This phenomenon is called “red-eye”. Mode anti-yeux rouges Sur les photos au flash, en basses lumières, les sujets peuvent se présenter avec des yeux rouges. Ce phénomène est appelé “yeux rouges&...
Page 60 - Questions et réponses
Questions et réponses Ü - l A.l Est-ce que des diapositives peuvent être utilisées avec cet appareil? Oui, elles le peuvent, cependant, il convient d'utiliser des films codés DX et d’une sensibilité de 25, 50, 100, 200, 400, 800, 1600 ou 3200 ISO. Q’2 Qu’est-ce que ISO? R.2 Le nombre ISO indique la ...
Page 62 - Fiche technique; Plage de distance de prises de vues
Fiche technique Тлре: Appareil 35 mm entièrement automatique avec objectif zoom intégré Taille de l'écran d'affichage: 24 x 36 mm (taille standard) Objectif: Objectif Canon 38-85 mm f/3.8-8 Commande AF: Système actif d'évaluation Plage de distance de prises de vues; 0,6 m à l'infini (gros plan 0.45 ...