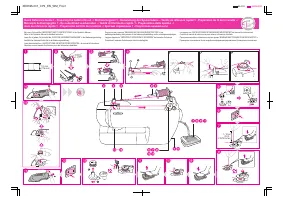
Page 3 - “IMPORTANTES CONSIGNES DE SECURITE”; “CONSERVER CES INSTRUCTIONS”
“IMPORTANTES CONSIGNES DE SECURITE” Lors de l’utilisation de la machine à coudre, il convient de toujours suivre les consignes de sécurité essentielles et de prendre notamment les précautions suivantes: “Lire toutes les instructions avant d’utiliser la machine.” DANGER - Pour réduire le risque de dé...
Page 4 - CONTENTS; TABLE DES MATIÉRES
CONTENTS Page PRINCIPAL PARTS.................................................................... 1PRINCIPAL PARTS.................................................................... 2ACCESSORIES .......................................................................... 3OPERATING YOUR SEWING MACHIN...
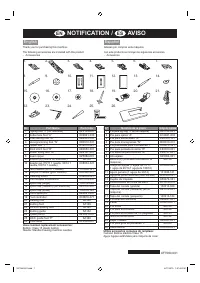
Page 5 - ACCESSORIES; ACCESSOIRES; ПРИНАДЛЕЖНОСТИ
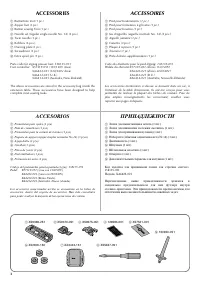
3 1 X59369-251 2 X59370-051 7 XA3442-151 9 130920-051 3 X59375-051 4 129583-001 5 X57521-001 6 X52800-150 8 X55467-051 ACCESSORIES a Buttonhole foot (1 pc.) b Zipper foot (1 pc.) c Button sewing Foot (1 pc.) d Needle set (regular single needle No. 14) (3 pcs.) e Twin needle (1 pc.) f Bobbins (3 pcs....
Page 6 - Connecting Plugs; FONCTIONNEMENT DE LA; Raccordement; FUNCIONAMIENTO DE LA; Conexión de los enchufes; РАБОТА НА ШВЕЙНОЙ; Подключение электропитания
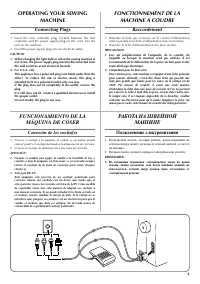
4 OPERATING YOUR SEWING MACHINE Connecting Plugs 1. Insert the foot controller plug, located between the foot controller and the power supply plug on the cord, into thejack on the machine. 2. Insert the power supply plug into an electrical outlet. CAUTION:1. When changing the light bulb or when the ...
Page 7 - Main Power and Sewing Light Switches; Foot Controller; Interrupteur principal et de la lampe; Interruptor principal y de luz; Выключатель питания и лампочки
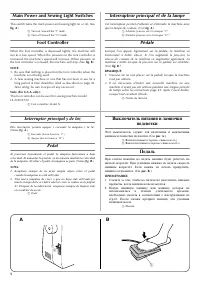
5 1 2 1 Main Power and Sewing Light Switches This switch turns the main power and sewing light on or off. (See fig. A .) a Turn on (toward the “I” mark) b Turn off (toward the “O” mark) Foot Controller When the foot controller is depressed lightly, the machine willrun at a low speed. When the pressu...
Page 8 - Inserting the Needle; Checking the Needle; Pour mettre l’aiguille en place; Vérification de l’aiguille; Comprobación de la aguja; Установка иглы; Проверка иглы
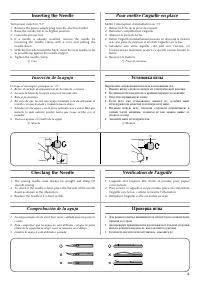
6 1 1 Inserting the Needle Turn power switch to “O”.1. Remove the power supply plug from the electrical outlet.2. Raise the needle bar to its highest position.3. Lower the presser foot.4. If a needle is already installed, remove the needle by loosening the needle clamp with a coin and pulling thenee...
Page 9 - Changing the Presser Foot; Cambio del prensatelas; Замена прижимной лапки
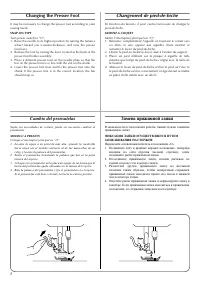
7 Changing the Presser Foot It may be necessary to change the presser foot according to yoursewing needs. SNAP-ON TYPE Turn power switch to “O”.1. Raise the needle to its highest position by turning the balance wheel toward you (counterclockwise), and raise the presserfoot lever. 2. Release the foot...
Page 10 - Converting to Free-Arm Style; Steadying the Machine; Modèle bras libre; Pour stabiliser la machine; Para estabilizar la máquina; Переоборудование машины для работы с; Обеспечение устойчивости машины
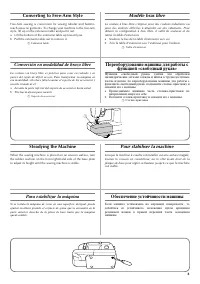
8 1 Converting to Free-Arm Style Free-Arm sewing is convenient for sewing tubular and hard-to-reach areas on garments. To change your machine to the free-armstyle, lift up on the extension table and pull it out. a Lift the bottom of the extension table up toward you. b Pull the extension table out t...
Page 11 - ac; VARIOUS CONTROLS; Pattern Selection Dial; DESCRIPTIF DES DIFFERENTES; DISTINTOS MANDOS; Selector de puntadas; ОРГАНЫ УПРАВЛЕНИЯ; Ручка выбора вида строчки
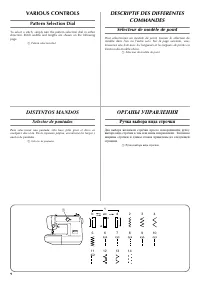
9 b ac 1 d 2 c a 3 4 5 12 14 13 11 1 6 7 8 9 10 VARIOUS CONTROLS Pattern Selection Dial To select a stitch, simply turn the pattern selection dial in eitherdirection. Stitch widths and lengths are shown on the followingpage. a Pattern selection dial DESCRIPTIF DES DIFFERENTES COMMANDES Sélecteur de ...
Page 12 - PATTERNS AND STITCH NAMES; MOTIFS ET NOMS DES POINTS
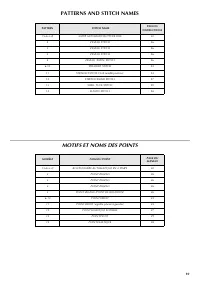
10 PATTERNS AND STITCH NAMES PATTERN STITCH NAME PAGE IN INSTRUCTIONS 1(a-b-c-d) 4-STEP AUTOMATIC BUTTONHOLE 30 2 ZIGZAG STITCH 26 3 ZIGZAG STITCH 26 4 ZIGZAG STITCH 26 5 ZIGZAG (SATIN) STITCH 26 6-10 STRAIGHT STITCH 24 11 STRAIGHT STITCH (Left needle position) 24 12 STRETCH BLIND STITCH 27 13 SHELL...
Page 13 - Reverse Sewing Lever; THREADING THE MACHINE; Winding the Bobbin; Levier de couture en marche arrière; ENFILAGE DE LA MACHINE; Remplissage de la canette; Palanca de retroceso; Клавиша шитья в обратном направлении
12 Reverse Sewing Lever To sew in reverse, press down the reverse sewing lever as far aspossible and hold it in that position while lightly stepping on thefoot controller. To sew forward, release the reverse sewing lever.Reverse sewing is used for locking and reinforcing seams. THREADING THE MACHINE...
Page 15 - Mise en place du fil supérieur
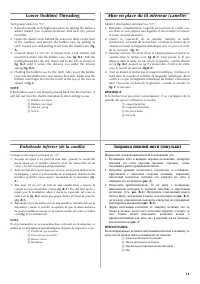
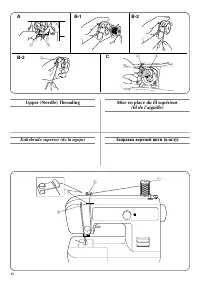
15 1 2 3 2 4 2 3 4 1 Upper (Needle) Threading Mise en place du fil supérieur (fil de l’aiguille) Enhebrado superior (de la aguja) Заправка верхней нити (в иглу) A B-1 B-2 C B-3
Page 16 - TWIN NEEDLE THREADING; Couture avec l’aiguille jumelée
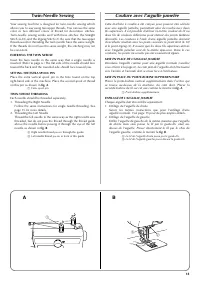
18 1 3 2 Twin-Needle Sewing Your sewing machine is designed for twin-needle sewing whichallows you to sew using two upper threads. You can use the samecolor or two different colors of thread for decorative stitches.Twin-needle sewing works well with these stitches: the StraightStitch (6-10)-and the ...
Page 17 - Thread Tension; Tension des fils; Tensión de los hilos; Натяжение нитей; Возможные затруднения и методы их разрешения.; AE1 Дисковый регулятор натяжения верхней нити; BE1 Дисковый регулятор натяжения верхней нити
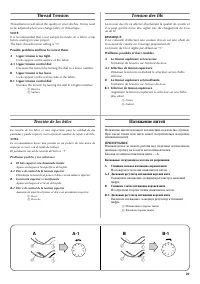
20 Thread Tension Thread tension will affect the quality of your stitches. It may needto be adjusted when you change fabric or thread type. NOTE: It is recommended that a test sample be made on a fabric scrapbefore sewing on your project.The basic thread tension setting is “5”. Possible problems and...
Page 18 - Слишком слабое натяжение нижней нити.
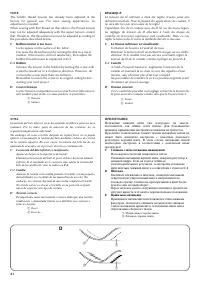
21 2 1 2 1 NOTE: The bobbin thread tension has already been adjusted at thefactory for general use. For most sewing applications, noadjustment is needed.When sewing with thin thread on thin fabrics, the thread tensionmay not be adjusted adequately with the upper tension controldial. Therefore, the t...
Page 19 - TABLEAU DES COMBINAISONS TISSU/AIGUILLE/FIL
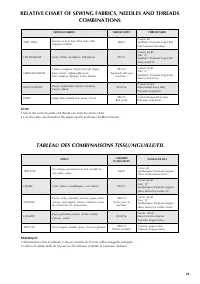
22 RELATIVE CHART OF SEWING FABRICS, NEEDLES AND THREADS COMBINATIONS NOTE: 1.Select the correct needle and thread size from the above chart.2.Use the same size thread for the upper (spool) and lower (bobbin) threads. SEWING FABRICS NEEDLE SIZES THREAD SIZES VERY THIN Fine tricot, Fine lace, Thin li...
Page 20 - Straight Stitching; Point droit; Puntada recta; Прямая строчка
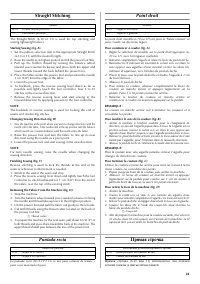
24 Straight Stitching The Straight Stitch (6-10 or 11) is used for top stitching andsewing lightweight fabrics. Starting Sewing (fig. A) 1. Set the pattern selection dial to the appropriate Straight Stitch (6-10 or 11) with the desired length. 2. Raise the needle to its highest position and lift the...
Page 21 - Zigzag Stitching; ZIGZAG STITCH; Points zigzag; Puntadas zigzag; Шитьё строчкой «зигзаг»; СТРОЧКА «ЗИГЗАГ»
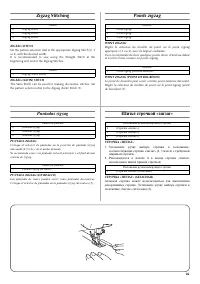
26 Zigzag Stitching ZIGZAG STITCH Set the pattern selection dial to the appropriate Zigzag Stitch (2, 3or 4) with the desired width.It is recommended to sew using the Straight Stitch at thebeginning and end of the Zigzag Stitches. ZIGZAG (SATIN) STITCH The Satin Stitch can be used for making decorat...
Page 22 - Elastic Stitching; MENDING; JOINING FABRIC; Point élastique; Puntada elástica; Эластичная строчка; РЕМОНТ ТКАНИ; ПРИШИВАНИЕ ЭЛАСТИЧНОЙ ТЕСЬМЫ; СТАЧИВАНИЕ ТКАНЕЙ
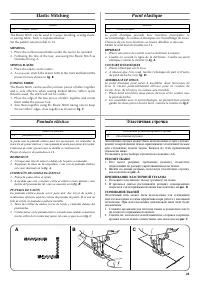
28 Elastic Stitching The Elastic Stitch can be used in 3 ways: mending, sewing elasticor joining fabric. Each is explained below. Set the pattern selection dial to 14. MENDING 1. Place the reinforcement fabric under the tear to be mended.2. Following the line of the tear, sew using the Elastic Stitc...
Page 23 - Making a Buttonhole; MAKING A BUTTONHOLE; Création d’une boutonnière; Para coser ojales; Выметывание петель; ВЫПОЛНЕНИЕ ВЫМЕТЫВАНИЯ ПЕТЕЛЬ
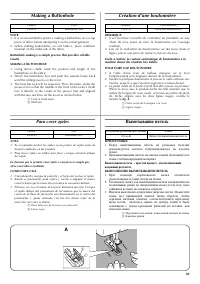
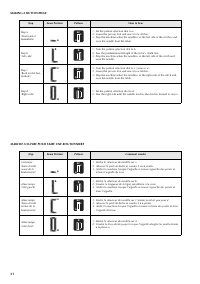
30 2 1 Making a Buttonhole NOTE: 1. It is recommended to practice making a buttonhole on a scrap piece of fabric before attempting it on the actual garment. 2. When making buttonholes on soft fabrics, place stabilizer material on the underside of the fabric. Buttonhole-making is a simple process tha...
Page 25 - ЗАКРЕПЛЕНИЕ СТРОЧКИ И ПРОРЕЗКА ПЕТЛИ
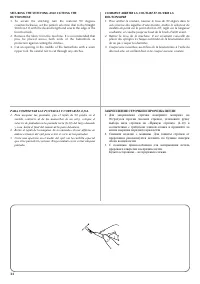
33 SECURING THE STITCHING AND CUTTING THE BUTTONHOLE 1. To secure the stitching, turn the material 90 degrees counterclockwise, set the pattern selection dial to the StraightStitch (6-10) with the desired length and sew to the edge of thefront bar tack. 2. Remove the fabric from the machine. It is r...
Page 26 - Buttonhole Fine Adjustment; Equilibrage des boutonnières; Ajuste fino de los ojales; Точная настройка при выметывании
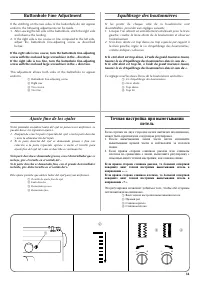
34 1 2 + – 3 4 + – Buttonhole Fine Adjustment If the stitching on the two sides of the buttonhole do not appearuniform, the following adjustments can be made.1. After sewing the left side of the buttonhole, stitch the right side and observe the feeding. 2. If the right side is too coarse or fine com...
Page 27 - Button Sewing; Pour coudre un bouton; Coser botones; Пришивание пуговиц
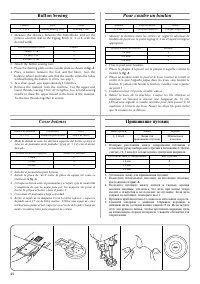
35 Button Sewing 1. Measure the distance between the buttonholes and set the pattern selection dial to the Zigzag Stitch (2, 3 or 4) with thedesired width. 2. Attach the button sewing foot.3. Place the darning plate on the needle plate as shown in fig. A . 4. Place a button between the foot and the ...
Page 28 - Zipper Insertion; Insertion de fermeture à glissière; Poner de cremalleras; Вшивание застежки «молния»
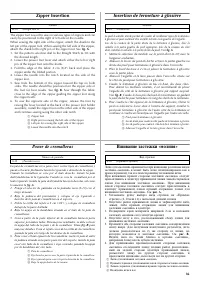
36 Zipper Insertion The zipper foot is used to sew on various types of zippers and caneasily be positioned to the right or left side of the needle. When sewing the right side of the zipper, attach the shank to theleft pin of the zipper foot. When sewing the left side of the zipper,attach the shank t...
Page 29 - Monogramming and Embroidering; PREPARING FOR MONOGRAMMING AND EMBROIDERING; Monogrammes et broderies; Monogramas y bordados; Выстрачивание монограмм и вышивание
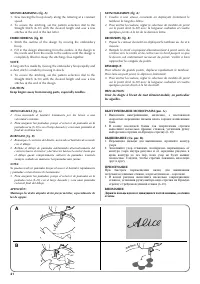
40 Monogramming and Embroidering PREPARING FOR MONOGRAMMING AND EMBROIDERING 1. Place the darning plate on the needle plate.2. Set the pattern selection dial to the appropriate Zigzag Stitch (2, 3, 4 or 5). 3. Draw the lettering (for monogramming) or design (for embroidering) on the surface of the f...
Page 31 - Removing the Shuttle Hook; Graissage; Engrasado; Смазка
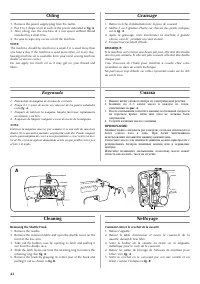
43 Oiling 1. Remove the power supply plug from the outlet.2. Put 2 to 3 drops of oil at each of the points indicated in fig. A . 3. After oiling, run the machine at a fast speed without thread installed for a short time. 4. Be sure to wipe any excess oil off the machine. NOTE: The machine should be ...
Page 32 - Cleaning the Shuttle Race; Limpieza; Чистка; Извлечение челнока
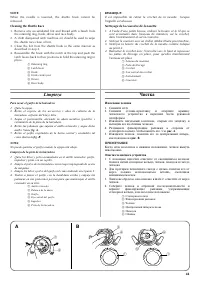
44 1 2 6 1 5 1 3 4 NOTE: When the needle is lowered, the shuttle hook cannot beremoved. Cleaning the Shuttle Race 1. Remove any accumulated lint and thread with a brush from the retaining ring, hook, driver and race body. 2. A cloth dampened with machine oil should be used to wipe the shuttle race c...
Page 33 - Cleaning the Feed Dogs; Performance Checklist; Liste de vérification en cas de; Listado de posibles incidencias; Очистка гребенок транспортера; Таблица контрольных проверок
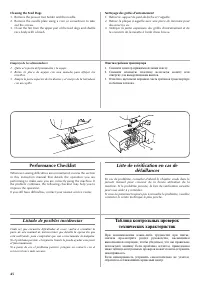
45 Cleaning the Feed Dogs 1. Remove the presser foot holder and the needle.2. Remove the needle plate using a coin or screwdriver to take out the screws. 3. Clean the lint from the upper part of the feed dogs and shuttle race body with a brush. Performance Checklist Whenever sewing difficulties are ...
Page 34 - LISTE DE VERIFICATION EN CAS DE DEFAILLANCES; CONTACTER LE CENTRE TECHNIQUE LE PLUS PROCHE
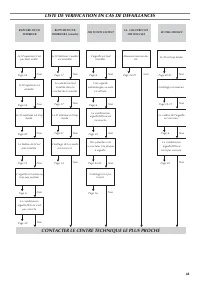
48 LISTE DE VERIFICATION EN CAS DE DEFAILLANCES RUPTURE DU FIL SUPERIEUR LA COUTURE FAIT DES BOUCLES RUPTURE DU FIL INFERIEURÅ (canette) DES POINTS SAUTENT LE TISSU FRONCE Le fil supérieur n’est pas bien enfilé. Le fil inférieur (canette) est emmêlé. Le fil supérieur est emmêlé. Le fil supérieur est...
Page 35 - CONTACTER LE SERVICE TECHNIQUE LE PLUS PROCHE
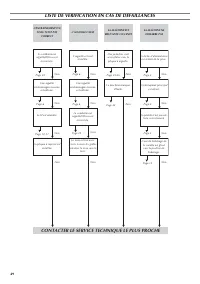
49 LISTE DE VERIFICATION EN CAS DE DEFAILLANCES CONTACTER LE SERVICE TECHNIQUE LE PLUS PROCHE L’ENTRAINEMENT DU TISSU N’EST PAS CORRECT LA MACHINE EST BRUYANTE OU LENTE LA MACHINE NE DEMARRE PAS L’AIGUILLE CASSE La combinaison aiguille/fil/tissu est incorrecte. Une aiguille endommagée ou usée est ut...
Page 36 - Repacking the Machine; Emballage de la machine; IMPORTANT; Embalaje de la máquina; IMPORTANTE; Повторная упаковка машины; ВАЖНО
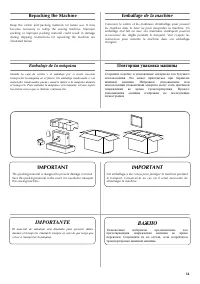
54 Repacking the Machine Keep the carton and packing materials for future use. It maybecome necessary to reship the sewing machine. Improperpacking or improper packing material could result in damageduring shipping. Instructions for repacking the machine areillustrated below. IMPORTANT This packing ...